So over the break I made my own Christmas card to send to my family using adobe
photoshop. I told Ruth and Tiffany that I would post on the blog how I did that so here's a quick little tutorial on the basic steps of creating your own Christmas card, or any kind of graphic really. (I made the pictures small since it's such a huge post. To view them better just click on the picture.)
For this tutorial I'll be using this picture. And the program I'll be using is Adobe
Photoshop 7.0.
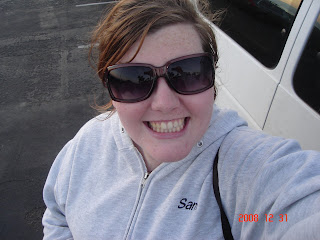
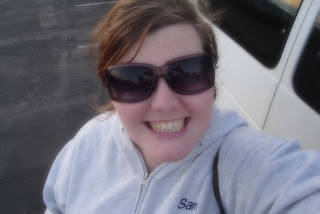
First I'm going to crop out the date stamp on the bottom of the photo. The crop tool is on the toolbar on the left. It is the third button down in the first column. Click on it and then move the mouse over to the picture. Crop your desired photo.
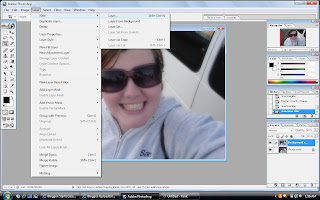
Next we'll create a duplicate layer to work with. The last toolbar on the right shows the layers. Right now all that should be showing is the background layer. Right click on that layer and click on duplicate layer. Click okay and a new layer will be formed.
One of my favorite effects is the dream-like effect. It looks like this.
It's a very subtle effect, but I like it. On my Christmas card I did a color overlay as well using red, but you can pick whatever color you think is best.
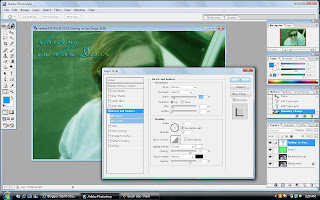
The first step will be to create a new blank layer. To do this click on layer, new, and then layer. Like this.
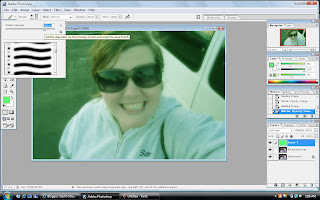
Now that you have a new layer go over to the toolbar on the left and click on the top color square near the bottom of the toolbar. It will bring up a color picker. Choose whatever color you want and you can continue to play with the color until you find the perfect one. I'm going to be using green this time because it's my favorite color.
Once you have selected a color click okay. Now go back to the left side toolbar and click on the brush tool. It's the fourth one down in the second column. The brush will probably be small and it will take forever to color in the entire picture so go up to the main toolbar. Under the image button is one that says brush. Click on the button that says brush. At the very top of the box that appears is a bar with a slider that says master diameter. Move it up. Like this.
In this picture you can also see the end result of the color overlay.
Now that you have a color picked out and a decent sized brush begin coloring on the blank new layer. It will paint over your picture, but don't worry that's okay. Once you're satisfied with your color choice and the entire photo is covered move over to the right side toolbar. On the layers toolbar there are two very important buttons for making amazing effects on pictures. One will say normal and the other will say Opacity: 100%. First we'll click on the Opacity button. I usually begin by setting it at 50%. Now click on the drop down bar that says normal. I used the soft light setting, but have fun and try out different ones until you find one you like. I then moved my opacity setting up to 80% because I felt the color showed more at that setting. Play around until you like the end result.
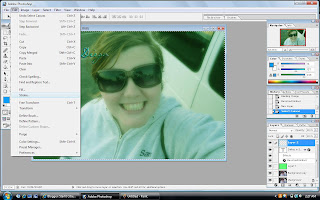
When you're happy with the results of that it's time to add the text. I use the website dafonts.com to download new fonts for free. My favorite one that I've downloaded is called Jane Austen and that's what I'll be using. (I'll make another post explaining how to download fonts.)
First we'll go to the left side toolbar and click on the arrow button at the top in the second column so the mouse goes back to normal from its brush phase. Now create a new layer. Then again on the left side toolbar click on the T button. It's the eighth one down in the second column. Make a text box wherever you like on the picture. The toolbar under the main toolbar at the top of the page should be text related now. Select your font and text size. The text size goes up to 72 if this is not big enough simply click on the box and type in a number until you're happy with the size. Type your desired text. The color is going to be the same one that you just used for the color overlay, but don't worry you can change that later.
Now to make effects on your text there are many different things you can do and you don't have to do all of them. To do any effect on the text first you must go click on the arrow button again on the left side toolbar. I did an overlay effect first by going over to the layer toolbar and selecting overlay from the drop down bar that usually says normal. I then did an embossing effect.
To make this effect click layer and then layer style and then bevel and emboss. The style I selected is emboss and the technique I selected is soft. Like this.
This picture also shows my finished text.
Now for the final step I like to add a simple border. First create a new layer. Then on the main toolbar click on select and then all. It will put a dotted line around the entire image. Now go to edit, stroke. Like this.
I selected black as the color and I made it 15px. Click okay. I then went over to the layer toolbar and selected overlay. After that go back to select and click deselect. If you want a larger border simply reselect all again and go through the same process only make the pixel size larger.
Your picture is now finished. Now if you would like to make a card that looks like this simply do the following.
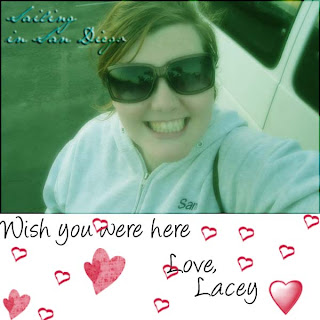
We're going to create an entirely new background. To do this go to file and click new. Make sure the width and height are set to pixels. Then type in a desired width and height. I did 600x600. Click okay. Now that you have that go back to your other project. make sure you click on it so that it's selected. Go to the main tool bar and click on image and then image size. Again make sure it's set to pixels and make sure at the bottom of the box that constrained proportions is checked. Then change the width to match whatever you selected for your other background. I typed in 600 of course.
Next go back to the main tool bar and click on layer and then flatten image. Make sure you have the arrow selected on the left side toolbar and drag the image to your blank background. I put my picture at the top, but you can put it wherever you like. When that is done I simply clicked on the T so i could make a text box and picked a font I liked (it's called Angelina) and typed in my desired text. The hearts are a special brush I downloaded and that's a bit more complicated and I can discuss in another tutorial if anyone wants it.
You now have a completed Christmas card, or in my case a wish you were here card.
If you need something explained more fully just ask and if you like this tutorial and would like to learn more advanced techniques let me know and I'll do another one, but only if it's wanted :)


